Astrophotography, the art of capturing photos of stars, planets, and celestial wonders, has traditionally been associated with expensive cameras and complex, bulky equipment. Many beginners assume that without a DSLR or high-end mirrorless camera paired with costly lenses and mounts, capturing the night sky is out of reach. However, recent advancements in smartphone camera technology, combined with affordable accessories and smart techniques, have dramatically lowered the entry barrier. Today, you can start astrophotography on a budget, using nothing more than your smartphone and a few inexpensive tools.
This comprehensive guide will walk you through how to shoot the stars with your phone. From essential gear recommendations and app choices to practical shooting tips and post-processing advice, you’ll learn everything needed to create beautiful, impressive astrophotos without draining your wallet.
Why Choose Smartphone Astrophotography?
Smartphones have revolutionized photography by packing powerful sensors, sophisticated image processing, and user-friendly interfaces into devices that fit in your pocket. Unlike traditional cameras, which often require knowledge of optics and manual controls, smartphones offer convenience and accessibility. Here’s why smartphone astrophotography is an excellent choice for budget-conscious beginners:
- Lower Cost: Unlike professional cameras costing hundreds or thousands of dollars, your smartphone is likely already capable of capturing night sky images, minimizing extra expenses.
- Portability and Ease of Use: Smartphones are lightweight and intuitive. No need for complicated setups — just point, shoot, and share.
- Quick Sharing: Instantly upload your photos to social media, astronomy forums, or share with friends.
- Learning Platform: It’s an ideal way to start experimenting and understanding astrophotography principles before investing in more advanced gear.
By harnessing your smartphone’s capabilities, you can enjoy the thrill of astrophotography without the traditional financial or technical hurdles.
Essential Gear for Smartphone Astrophotography on a Budget
While modern smartphone cameras are impressive, a few affordable accessories can significantly improve your astrophotography results:
1. Tripod or Stable Mount
Long-exposure shots are essential to capture faint stars and celestial details. Holding your phone by hand will cause blur due to movement. A tripod or stable mount keeps your phone perfectly steady during exposures. Budget mini tripods start as low as $10, and you can even craft DIY mounts from household materials like books, boxes, or clamps to reduce cost further.
2. Smartphone Telescope Adapter
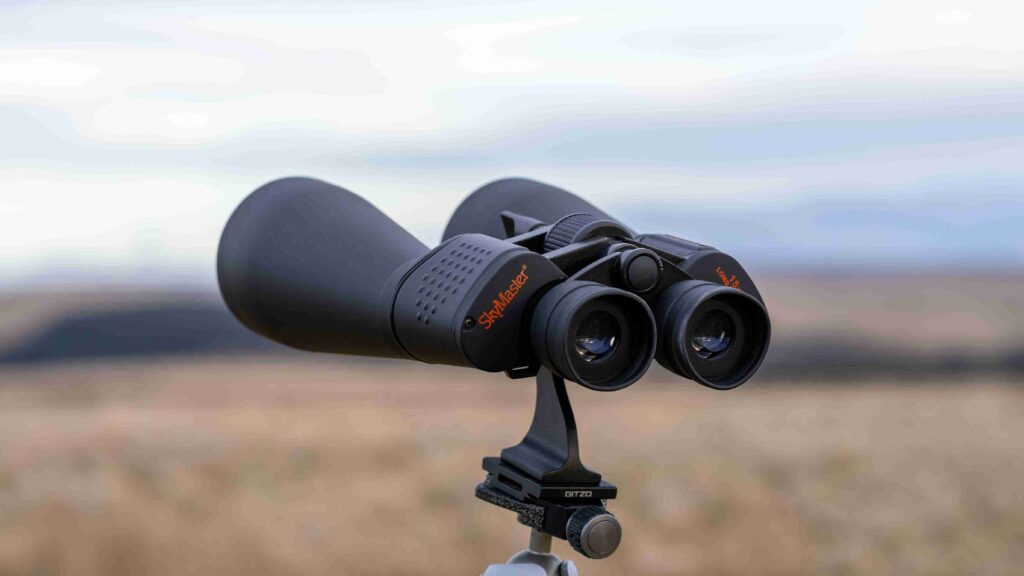
If you already own a telescope or binoculars, a clip-on smartphone adapter lets you connect your phone’s camera directly to the eyepiece. This setup enables you to photograph detailed lunar landscapes, planets like Jupiter or Saturn, and even some bright deep-sky objects. These adapters are inexpensive and greatly expand your astrophotography possibilities.
3. External Lenses (Optional)
Clip-on external lenses—such as wide-angle, macro, or telephoto—can enhance framing and image quality. While optional, affordable lenses can help you capture more expansive star fields or zoom in on specific features.
Recommended Apps for Astrophotography
Smartphone apps that provide manual camera controls and enhanced editing tools are crucial to unlocking your phone’s full astrophotography potential. Here are some top app choices:
- NightCap Camera (iOS): Enables long-exposure shooting with manual control over shutter speed, ISO, and focus—perfect for starry skies.
- Camera FV-5 (Android): Offers DSLR-like manual controls, including ISO adjustment, shutter speed, and white balance.
- ProCam X (Android): Allows for manual focus and long exposures, ideal for night photography.
- Adobe Lightroom Mobile: A powerful editing app for post-processing your images, helping bring out faint stars and reduce noise.
These apps empower you to adjust key settings, increasing light capture and image detail while reducing common issues like grainy noise.
Practical Tips for Capturing Stunning Star Photos With Your Phone
1. Find a Dark Location
Light pollution from city lights is the enemy of astrophotography. It washes out faint stars and diminishes contrast. To maximize your star visibility, head to a dark location, away from streetlights, buildings, and other sources of artificial light. Use online light pollution maps to find dark sky areas near you.
2. Use Manual Mode
Automatic camera modes struggle with night sky conditions. Switch to manual or “Pro” mode and adjust these settings:
- Shutter Speed: Set long exposures between 10 and 30 seconds to gather sufficient light. Be mindful longer exposures might cause star trails if your phone isn’t perfectly still.
- ISO: Increase ISO to boost sensitivity, but balance it to avoid excessive noise. Start around ISO 800 and experiment.
- Focus: Set to infinity or manually focus on a bright star or distant light to ensure sharp images.
3. Keep Your Phone Steady
Use a tripod combined with a remote shutter release or timer to avoid any camera shake caused by pressing the shutter button. Even slight movement blurs your photos during long exposures.
4. Shoot During Optimal Conditions
Clear, moonless nights are best for astrophotography. Clouds obscure stars, and moonlight brightens the sky, reducing contrast. Consult moon phase calendars and weather forecasts to plan your shoots on nights with minimal moonlight and clear skies.
5. Experiment With Composition
Don’t just focus on stars alone. Including foreground elements like trees, mountains, buildings, or even campfires can add depth and storytelling to your astrophotos, making them more captivating.
Post-Processing Your Astrophotos
Editing your images enhances details and brings out the beauty hidden in raw photos. Free and affordable apps like Adobe Lightroom Mobile or Snapseed offer powerful editing tools. Focus on:
- Adjusting brightness and contrast to highlight stars.
- Reducing noise to smooth grainy textures caused by high ISO settings.
- Increasing sharpness and clarity to bring out fine details.
- Enhancing colors subtly, especially the Milky Way’s glow.
Post-processing can transform good photos into stunning ones, so invest time to learn these techniques.
Advanced Techniques for Smartphone Astrophotography
Once you’re comfortable with basic shots, try these techniques to expand your skills:
- Star Trails: Use very long exposures or stack multiple shorter exposures to create mesmerizing star trail images, showing Earth’s rotation.
- Time-lapse: Capture sequential photos over time to create videos of the night sky’s movement.
- Moon Phases and Details: With a telescope adapter, capture close-up images of the moon’s surface and follow its phases.
- Stacking Software: Use apps or software that combine multiple images to reduce noise and increase clarity.
These methods take practice but offer rewarding results.
Final Thoughts
Astrophotography on a budget is not only possible but also incredibly rewarding. With just your smartphone, a few affordable accessories, and patience, you can capture awe-inspiring images of the night sky. The key lies in learning to work with your equipment, mastering manual settings, and finding dark skies. As your skills grow, you may decide to invest in more advanced gear, but starting with your phone ensures a low-risk, accessible entry into this mesmerizing hobby. Remember, the universe is vast and beautiful — and it’s waiting for you to capture its wonders.